How to setup up a label mail merge in Microsoft Word
For step by step instructions on creating a label format and creating mail merge labels in Microsoft Word download the following pdf. For basic instructions using the Mail Merge Wizard see below.
The Basics
This tutorial will show how to setup up a label mail merge in Microsoft Word.
Step 1:
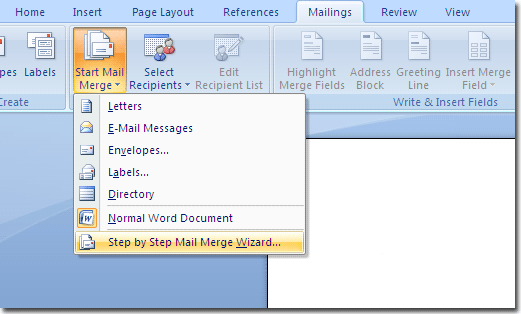
Open Microsoft Word then click on the "Mailings" tab. Select "Start Mail Merge" then "Step by Step Mail Merge Wizard".
Step 2:
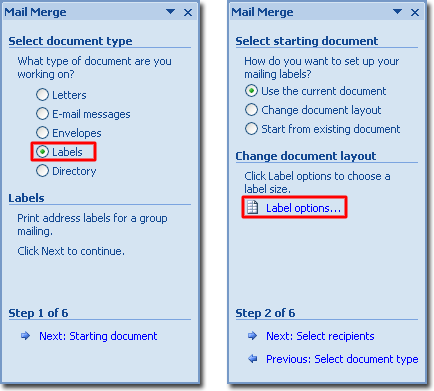
The following box will appear on the right hand side of your screen. Select "Labels" then click "Next: Starting Document".
Step 3:
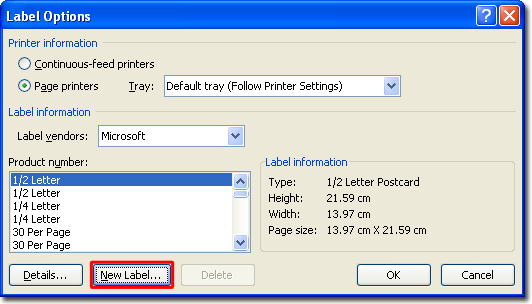
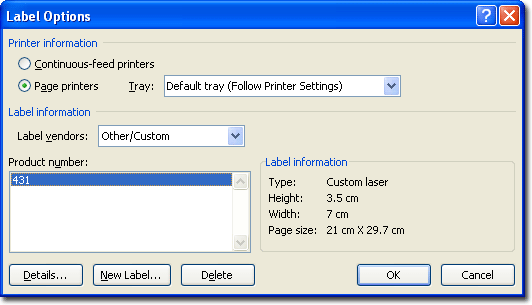
Click "Label Options" and the following dialog box will appear. You will need to add the label shape you have to the list, so click "New Label". (For this example we will be using 431)
Step 4:
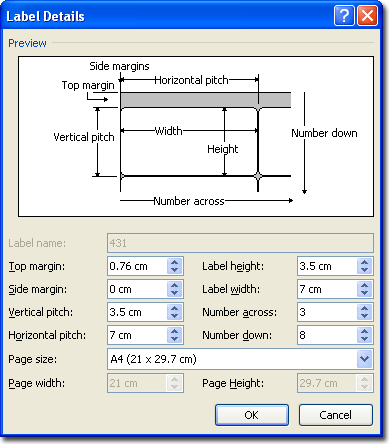
Fill in the label properties. These can be found on each product's page on this website. Be careful to pay attention to the difference between millimetres and centimetres.
Step 5:
Now this label shape will be available under the "Other/Custom" Label vendor.
Step 6:
Follow the rest of the steps in the wizard to add text to your labels.
